|

Total :
Today : , Yesterday :
|

CentOS 6.3 X64 기준
아파치 2.2.15
실행 : /etc/init.d OR service httpd start
아파치 2.2.15
실행 : /etc/init.d OR service httpd start
설정파일 : /etc/httpd/conf, /etc/httpd/conf.d/php.conf
UserDir public_html (372)
Starting httpd: httpd: apr_sockaddr_info_get() failed for test
=> 276라인 ServerName 지정해주면 나타나지 않음
372라인 UserDir public_html
401라인 DirectoryIndex index.html index.html.var 확인
758라인 AddDefaultCharset UTF-8
* AddType application/x-httpd-php .php .htm .php3 .html
* AddType application/x-httpd-php-source .phps
=> PHP인식 위에 2가지 옵션을 적었는데 6.3 버전 RPM구성시 적지 않아도
자동으로 PHP인식 확인(httpd.conf가 아닌 php.conf에 설정되어 있는것 같음)
홈폴더 : /var/www/html
기본 index.html
Mysql 5.1.69
실행 : /etc/init.d OR service mysqld start (설정파일 /etc/my.cnf)
DB파일위치 : /var/lib/mysql
소켓위치 : /var/lib/mysql/mysql.sock
log-error=/var/log/mysqld.log
pid-file=/var/run/mysqld/mysqld.pid
기타관련 파일 위치 : /usr/bin => mysqladmin도 여기에 위치함
[root@firewall bin]# service mysqld start
MySQL 데이타베이스를 초기화하는 중: Installing MySQL system tables...
=>처음 데몬을 실행하면 DB을 초기한다.
[root@test bin]# mysql -u root -p
Enter password:
Welcome to the MySQL monitor. Commands end with ; or \g.
Your MySQL connection id is 4
Server version: 5.1.69 Source distributionCopyright (c) 2000, 2013, Oracle and/or its affiliates. All rights reserved.Type 'help;' or '\h' for help. Type '\c' to clear the current input statement.
mysql>
=>초기는 root 암호없이도 접속가능하므로 암호을 설정한다.
mysqladmin -u root password '암호' => 암호설정
mysql -u root -p => 연결
Enter password:
PHP 5.3.3
설정파일 : /etc/php.ini
693라인 register_globals = Off 기본값임
| CentOS APM에서 Mysql + PHP 연동 확인 (0) | 2013.06.19 |
|---|---|
| centos6.3 HDD(하드디스크) 추가 하기 (ext4) (0) | 2013.06.19 |
| CentOS - Yum 으로 APM연동 하기 (0) | 2013.06.17 |
| CentOS 6.3 X64 테스트 서버 설정 (0) | 2013.06.14 |
| Win7 + Centos5 멀티부팅시 참고점 (1) | 2013.06.10 |
1. apache 설치(httpd)
yum install httpd*
2. mysql 설치
yum install mysql*
yum install mysql-server
3. php 설치
yum install php*
4. php-mysql 연동 설치
yum install php-mysql
홈폴더에 test.php 만들고 브라우저로 테스트~
<?php
phpinfo();
?>
==========================================================
설정관련 참고사항
아파치 2.2.15
실행 : /etc/init.d OR service httpd start
설정파일 : /etc/httpd/conf , /etc/httpd/conf.d/php.conf
UserDir public_html (372)
Starting httpd: httpd: apr_sockaddr_info_get() failed for test
=> 276라인 ServerName 지정해주면 나타나지 않음
372라인 UserDir public_html
401라인 DirectoryIndex index.html index.html.var 확인
758라인 AddDefaultCharset UTF-8
* AddType application/x-httpd-php .php .htm .php3 .html
* AddType application/x-httpd-php-source .phps
=> PHP인식 위에 2가지 옵션을 적었는데 6.3 버전 RPM구성시 적지 않아도
자동으로 PHP인식 확인(httpd.conf가 아닌 php.conf에 설정되어 있는것 같음)
홈폴더 : /var/www/html
기본 index.html
| centos6.3 HDD(하드디스크) 추가 하기 (ext4) (0) | 2013.06.19 |
|---|---|
| [CentOS] 6.3 APM RPM설치시 실행 및 설정파일 위치 (0) | 2013.06.18 |
| CentOS 6.3 X64 테스트 서버 설정 (0) | 2013.06.14 |
| Win7 + Centos5 멀티부팅시 참고점 (1) | 2013.06.10 |
| CentOS 6.3 selinux 사용 안하기. (0) | 2012.12.04 |
Centos6.3 X 64버전 PHP 테스트서버 설치 요약 -DVD로 설치-
- Basic Storage Device 선택
- 인스톨 파일 타입 Create Custom Layout 선택
(/boot 200, SWAP 4GB, 나머지 모든용량 / => 파일시스템은 EXT4 선택)
- 설치 유형은 Basic Server
- 팩키지는 세부모드에서 Base system 쪽과 Server쪽의 System administrator tools 선택
- 설치 완료후 네크워크카드 확인후 인터넷 확인
(setup으로 IP 입력하고, ifcfg-eth0 파일에 ONBOOT=no을 yes로 변경후 인터넷 가능)
- vi /etc/sysconfig/selinux 사용안하기
- 설치 완료후 yum -y update 진행
| [CentOS] 6.3 APM RPM설치시 실행 및 설정파일 위치 (0) | 2013.06.18 |
|---|---|
| CentOS - Yum 으로 APM연동 하기 (0) | 2013.06.17 |
| Win7 + Centos5 멀티부팅시 참고점 (1) | 2013.06.10 |
| CentOS 6.3 selinux 사용 안하기. (0) | 2012.12.04 |
| [MRTG] CentOS5 MRTG서버 트래픽 모니터링 (0) | 2010.08.03 |
1. Win7 + Centos5 멀티부팅 되겠끔 설치 하면서 알아야 할것
* 먼저 물리적 하드1개는 2개의 파티션으로 잡는다.(C:400GB / 나머지 100GB 리눅스 설치)
* C 400GB에는 윈도우7 먼저 설치 한다.
* 나머지 남은 부분에 리눅스 설치한다.
(주의점 부트로더인 GRUB를 sda 에 설치한다.)
* GRUB로 부팅하면 디폴트로 0번째 리눅스로 부팅하고 OS선택 메뉴가 숨겨져 있다.
리눅스로 부팅해서 /etc/grub.conf 에서 수정한다.
- timeout 부팅화면선택시 머무리는 시간 10초정도
- hiddenmenu 주석처리 (OS선택 화면 보이게 함)
| CentOS - Yum 으로 APM연동 하기 (0) | 2013.06.17 |
|---|---|
| CentOS 6.3 X64 테스트 서버 설정 (0) | 2013.06.14 |
| CentOS 6.3 selinux 사용 안하기. (0) | 2012.12.04 |
| [MRTG] CentOS5 MRTG서버 트래픽 모니터링 (0) | 2010.08.03 |
| CentOS 5.4 네트워크로 설치하기 (0) | 2010.04.15 |
최신 배포판 CentOS 6.3 테스트 설치중 인데..5.X setup에서 Selinux 바로 설정 오프 할수 있었는데
6.3점에서는 방화벽 설정만 보이고 보이질 않아서 직접 수정하는 방법입니다.
1. cd /etc/sysconfig/
2. vi selinux
3. SELINUX=enforcing =>SELINUX=disabled
로 바꾸어 주면 됩니다.
| CentOS 6.3 X64 테스트 서버 설정 (0) | 2013.06.14 |
|---|---|
| Win7 + Centos5 멀티부팅시 참고점 (1) | 2013.06.10 |
| [MRTG] CentOS5 MRTG서버 트래픽 모니터링 (0) | 2010.08.03 |
| CentOS 5.4 네트워크로 설치하기 (0) | 2010.04.15 |
| HP 리눅스에서 하드 구성정보 (0) | 2009.11.25 |

2. yum install mrtg* (var/www/mrtg)
* mrtg을 인스톨 한다.
3. 그래픽 라이브러리 시스템에 설치되어 있는지 확인하고 없으면 설치한다.
*freetype/gd/libjpeg/libpng
4, /etc/snmp/snmp.conf 수정한다. 기본 커뮤니티 값은 public으로 했다.
사용자가 원하는 값을 줘도 무방하다.
5. cfgmaker --global 'WorkDir: /home/mrtg/public_html/' --global 'Language: korean' --global 'Options[_]: bits,growright' -output /home/mrtg/public_html/mrtg.cfg public@서버IP
* cfgmaker로 mrtg.cfg을 생성한다. workdir은 값의 저장장소로 웹표시가 가능해야 한다.
6.indexmaker --title "MRTG TEST" --output /home/mrtg/public_html/index.htm /home/mrtg/public_html/mrtg.cfg
*indenmaker로 인테스 파일을 생성한다. 인덱스파일은 위에서 설정한 웹표시가 가능한 장소이다.
7.vi /etc/cron.d/mrtg
*/5 * * * * root /usr/bin/mrtg /home/mrtg/public_html/mrtg.cfg --lock-file /var/lock/mrtg/mrtg_l --confcache-file /var/lib/mrtg/mrtg.ok
- corn에 등록해서 5분마다 실행하게 한다.
| Win7 + Centos5 멀티부팅시 참고점 (1) | 2013.06.10 |
|---|---|
| CentOS 6.3 selinux 사용 안하기. (0) | 2012.12.04 |
| CentOS 5.4 네트워크로 설치하기 (0) | 2010.04.15 |
| HP 리눅스에서 하드 구성정보 (0) | 2009.11.25 |
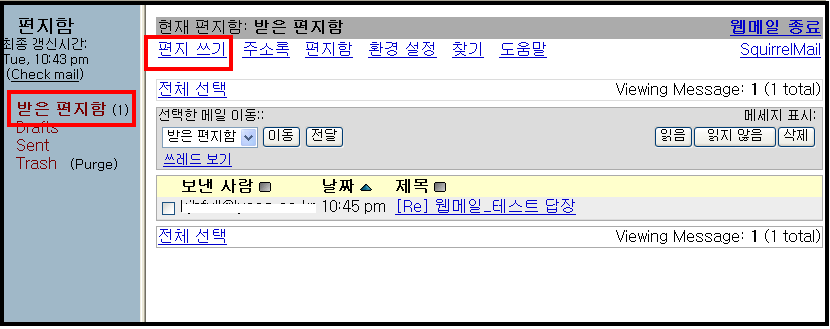
| centos5 웹메일 SquirrelMail 웹메일 설정 (1) | 2009.07.29 |
| CentOS 6.3 selinux 사용 안하기. (0) | 2012.12.04 |
|---|---|
| [MRTG] CentOS5 MRTG서버 트래픽 모니터링 (0) | 2010.08.03 |
| HP 리눅스에서 하드 구성정보 (0) | 2009.11.25 |
| centos5 웹메일 SquirrelMail 웹메일 설정 (1) | 2009.07.29 |
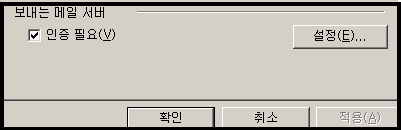
| centos5 sendmail + pop3 설정+SMTPAUTH 사용 (3) | 2009.07.28 |
[test]# df -h => OS설치된 첫번째 하드 정보 일반 /dev/sda 랑 틀림
Filesystem Size Used Avail Use% Mounted on
/dev/cciss/c0d0p2 7.9G 2.2G 5.1G 32% /
/dev/cciss/c0d0p5 58G 180M 52G 1% /home
/dev/cciss/c0d0p1 200 17M 78M 18% /boot
[root@]# fdisk /dev/cciss/c0d1
=> 두번째 하드 정보 일반알고 있는 /dev/sdb 랑 틀리네요
(아래 두번째 하드 정보 현재 새하드 상태임)
Command (m for help): p =>두번째 하드 정보
Disk /dev/cciss/c0d1: 73.3 GB, 73372631040 bytes
255 heads, 32 sectors/track, 17562 cylinders
Units = cylinders of 8160 * 512 = 4177920 bytes
Device Boot Start End Blocks Id System
| [MRTG] CentOS5 MRTG서버 트래픽 모니터링 (0) | 2010.08.03 |
|---|---|
| CentOS 5.4 네트워크로 설치하기 (0) | 2010.04.15 |
| centos5 웹메일 SquirrelMail 웹메일 설정 (1) | 2009.07.29 |
| centos5 sendmail + pop3 설정+SMTPAUTH 사용 (3) | 2009.07.28 |
| centos5 DNS네임서버 구축 -bind설정- (0) | 2009.07.28 |

| CentOS 5.4 네트워크로 설치하기 (0) | 2010.04.15 |
|---|---|
| HP 리눅스에서 하드 구성정보 (0) | 2009.11.25 |
| centos5 sendmail + pop3 설정+SMTPAUTH 사용 (3) | 2009.07.28 |
| centos5 DNS네임서버 구축 -bind설정- (0) | 2009.07.28 |
| SELINUX 설정 해제 하기 (0) | 2009.07.15 |


| HP 리눅스에서 하드 구성정보 (0) | 2009.11.25 |
|---|---|
| centos5 웹메일 SquirrelMail 웹메일 설정 (1) | 2009.07.29 |
| centos5 DNS네임서버 구축 -bind설정- (0) | 2009.07.28 |
| SELINUX 설정 해제 하기 (0) | 2009.07.15 |
| 리눅스 하드디스크 배드 블럭 점검 badblocks (0) | 2009.07.14 |

